


This guide is part of the Android series
Make: Quikstarts
Model / Product: N/A
Version: N/A
Objective / Info: Learn how to setup a Windows 7 computer with all the tools required for developing android applications using the Chrome browser. This guide assumes that you have basic software installation skills.
Model / Product: N/A
Version: N/A
Objective / Info: Learn how to setup a Windows 7 computer with all the tools required for developing android applications using the Chrome browser. This guide assumes that you have basic software installation skills.
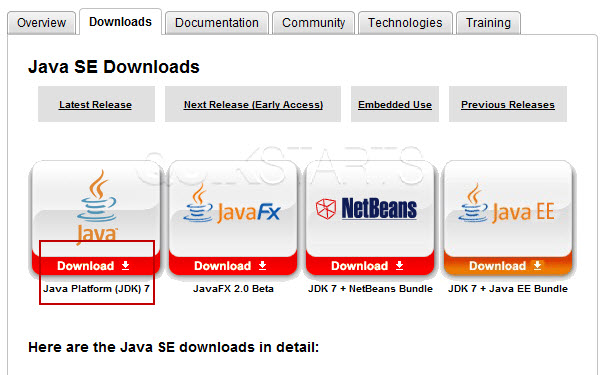
1
Visit http://goo.gl/xw3fS and install the Java JDK.
2
Select the licensing agreement and click the correct link based upon the operating system you are using
Note :
In this example we are using Windows 32 bit version.

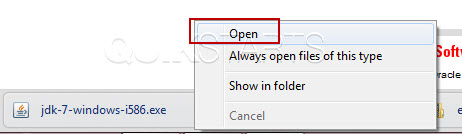
3
Open and run the JAVA JDK download.You may be redirected to a Java registration page after competing the installation. Registering is optional. The installation JAVA JDK should be complete.
4
Install the Eclipse IDE. Visit http://www.eclipse.org/downloads/

5
Open and run the Eclipse download.

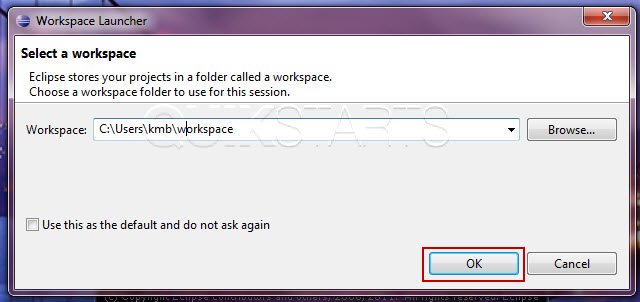
6
If you want to rename the folder that will serve as the primary folder for all of your Android projects going forward, now is the time. Simple change "workspace" to whatever name you would like to use and click the "Ok" button.
7
The eclipse install should start.

8
After the eclipse install ends, you should see the welcome page.
Note :
The Eclipse installation should be completed. Close any open folders or windows.

9
Close the welcome screen.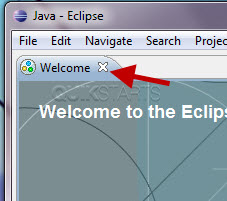
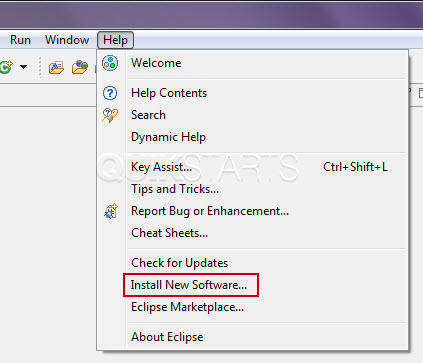
10
Click the "Help" link on the taskbar, then click the "Install New software" option.
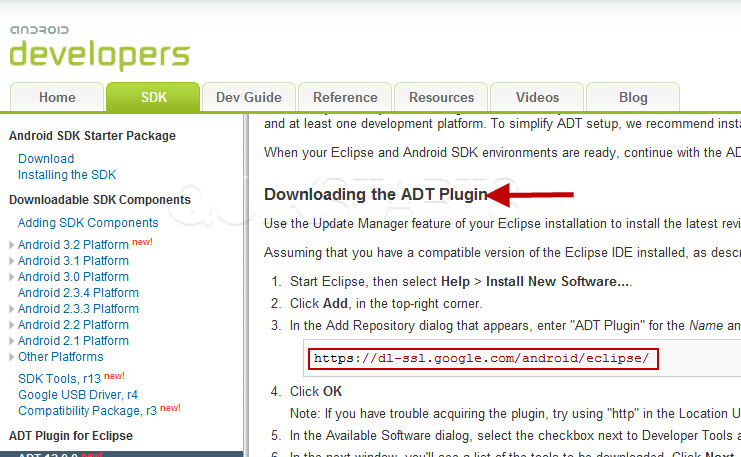
11
Open your web browser and visit http://developer.android.com/sdk/eclipse-adt.html. Scroll down the page until you reach the "Download the ADT Plugin" section. Copy the ADT plugin URL.
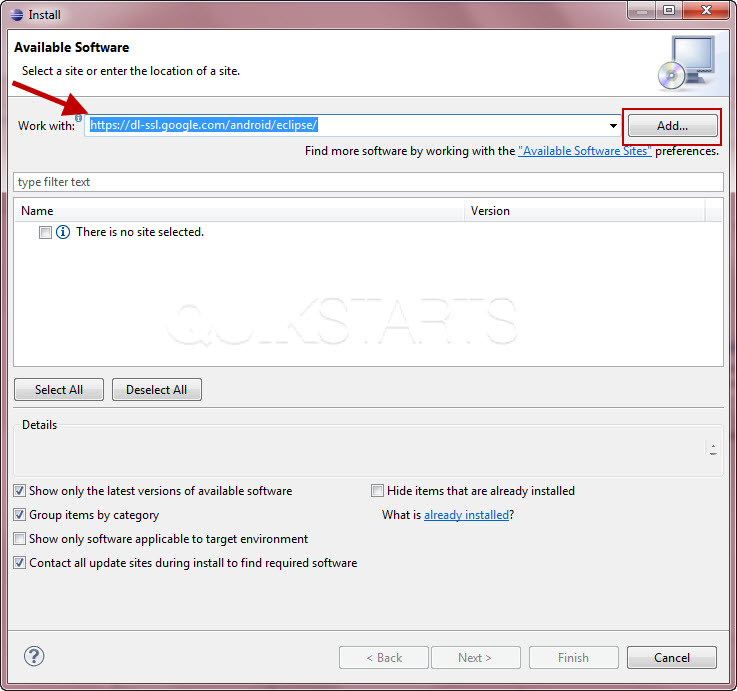
12
Go back to eclipse and paste the url in the "work with" field and click the "Add" button.
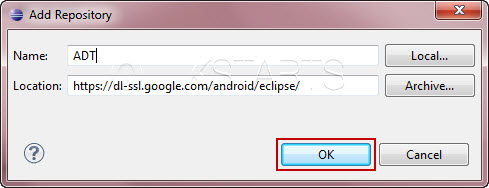
13
Name the download whatever you like and click the "Ok" button.
Note :
In this example we used the name ADT.
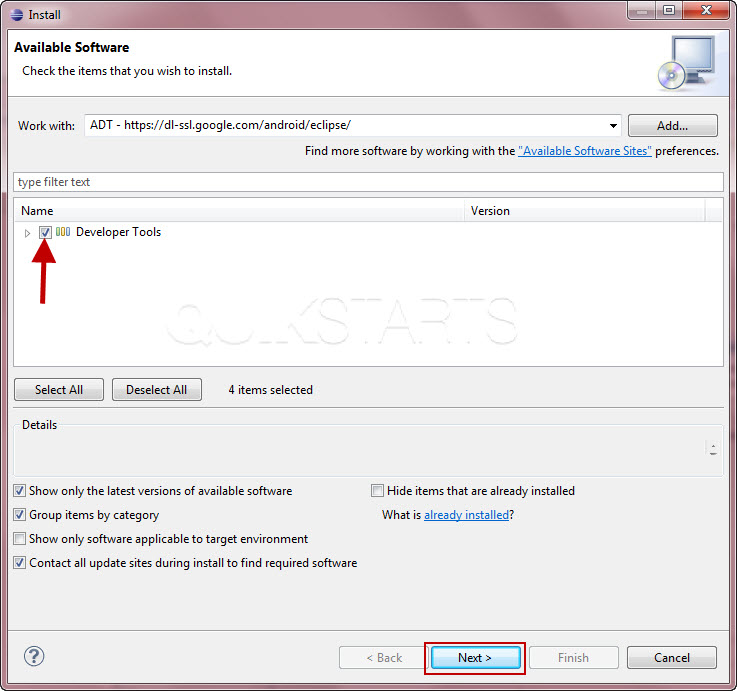
14
Check the "Developer Tools" option and click the "next" button.
15
Click the "next" button, then accept all of the licenses. Then click the "Finish" button.16
Finally, download the Android SDK by visiting http://developer.android.com/sdk/index.html and selecting the appropriate download.

17
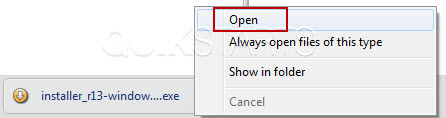
Open and run the Android SDK download.
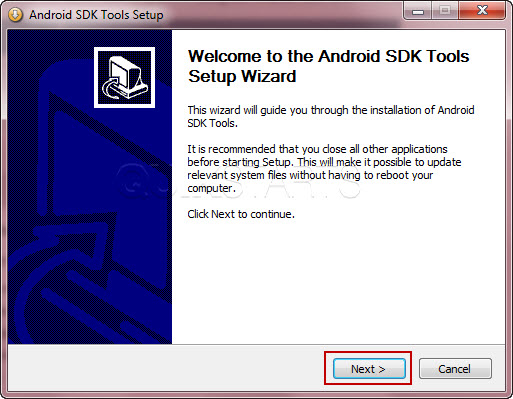
18
Click the "Next" button and follow the installation steps.
Note :
Select all default options when asked.
19
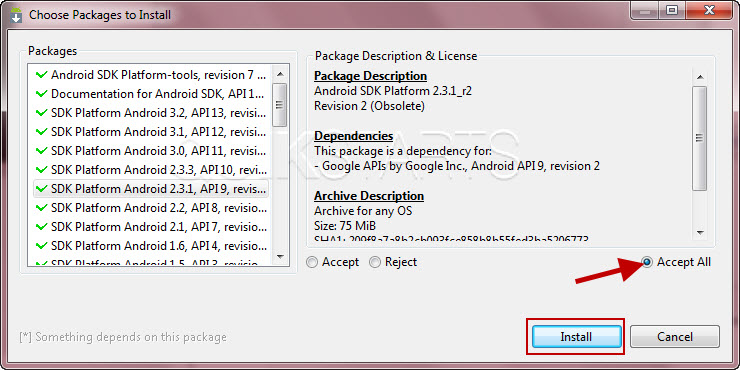
At the end of the installation you will be asked which elements of the SDK you need. To be sure you have everything required to develop on all available version of Android, select all the option and click the "Install" button.
20
You are now ready to begin developing android applications. This task should now be complete. If not, review and repeat the steps as needed. Submit any questions using the section at the bottom of this page.comments powered by Disqus
 Ask a question or provide an answer