


This guide is part of the Microsoft Outlook 2013 series
1.
How to add a link to an email in Outlook 2013
2. How to add a read receipt in Outlook 2013
3. How to add an attachment to Outlook 2013
4. How to change the theme in Outlook 2013
5. How to follow hyperlinks in Outlook 2013
6. How to forward an email in outlook 2013
7. How to print an email in Outlook 2013
8. How to read rss feeds with Outlook 2013
9. How to recall a sent email in Outlook 2013
10. How to send an email in Outlook 2013
Make: outlook 2013
Model / Product: Outlook
Version: 2013
Objective / Info: Learn how to setup Outlook 2013 after an installation and configure a single email address on a computer running Windows 7.
Model / Product: Outlook
Version: 2013
Objective / Info: Learn how to setup Outlook 2013 after an installation and configure a single email address on a computer running Windows 7.
1
Open Outlook from the start menu by clicking the Windows Icon in the lower right hand corner.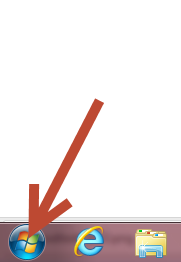
2
Click "All Programs"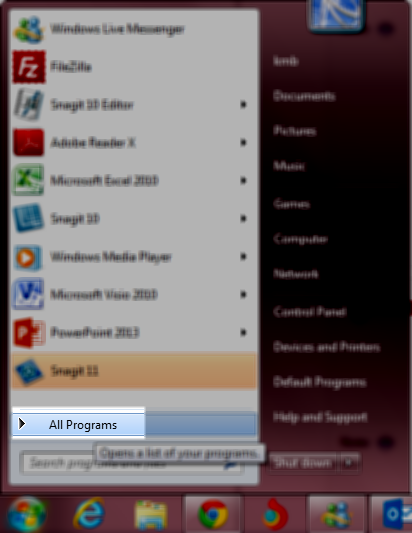
3
Find on the list and click "Microsoft Office 2013"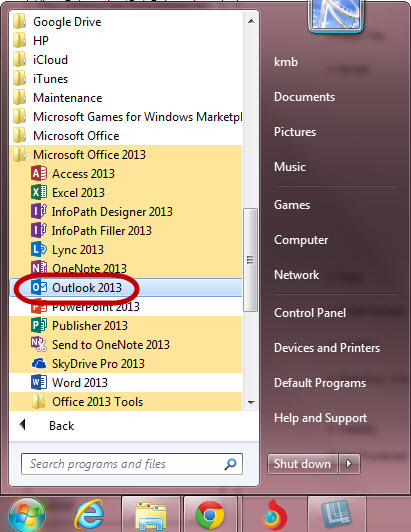
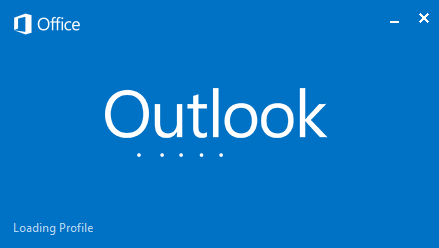
4
Outlook should open.
Note :
At this point, if you had previous versions of Outlook configured on this computer, you may see popup windows stating that the pst file can not be found. Click "Ok" or "Open" when prompted to proceed.
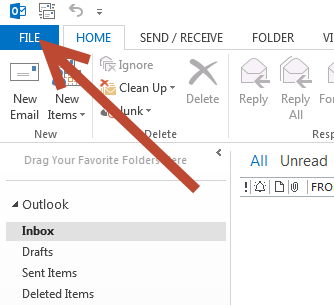
5
Click the "File" option in the upper left hand corner.
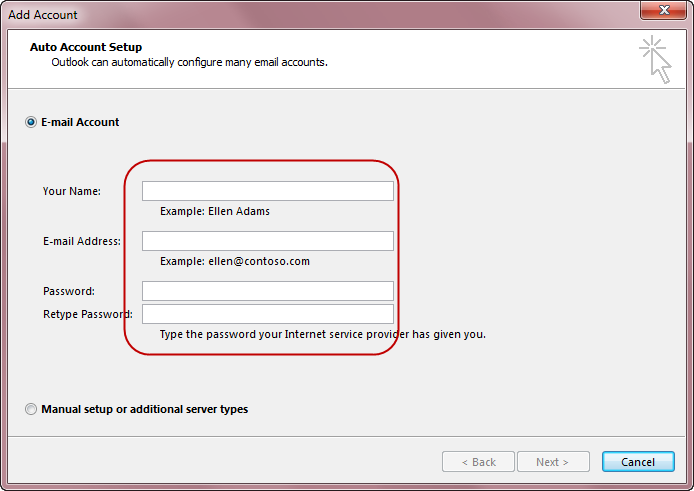
6
Check the first radio button and complete the 4 the email settings fields.
Note :
Contact your ISP or email provider for this information.
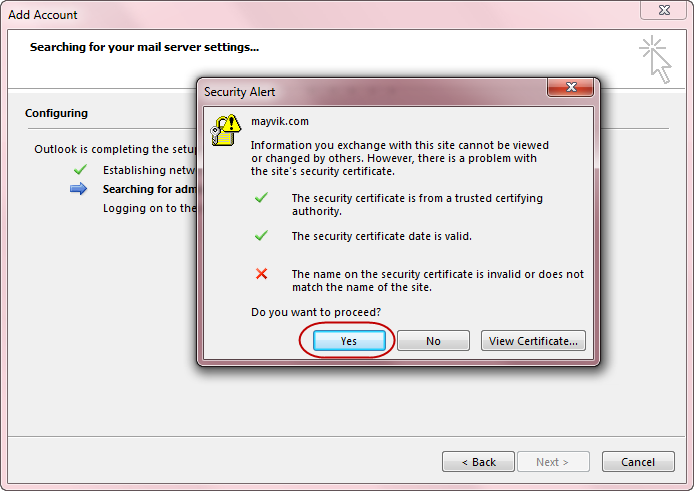
7
Outlook will look for a SSL certificate on your ISP / email providers server. Click "Yes" during the auto discover.
Note :
Your email will work without SSL. It is more secure with SSL.
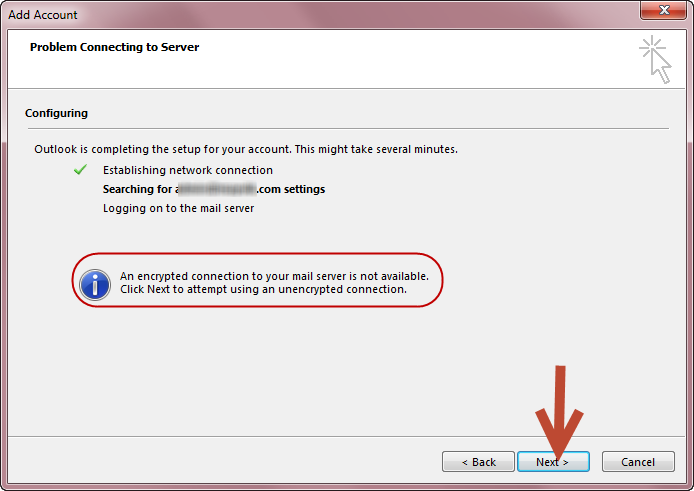
8
Note the notice about SSL not being available thus no encrypted email. Click the "Next" button to proceed.
Note :
If your email provider uses SSL, you should not see this message.
9
Outlook will continue with the setup.10
Your setup should be complete. Click the "Next" button. Note :Observe that this setup doesn't use encryption and has defaulted to IMAP versus POP. Neither of these should prevent you from using outlook.
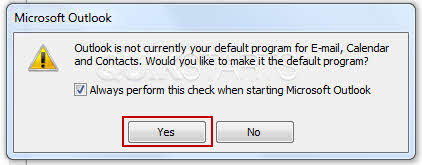
11
You should see a pop asking you if you want to make Outlook your default browser. Click "Yes" if you do and "No" if you do not.
Note :
This task should be complete. Review and try again if you did not get these results.
12
You should now see the main interface for email. There may be a test email from Microsoft in your inbox. In addition, any email that was in the inbox on the email server should populated into Outlook. Note :This task should be complete. Review and try again if you did not get these results.
comments powered by Disqus
 Ask a question or provide an answer