This guide is part of the Screen capture series
1.
How to take a pageshot on a MacBook Air
2. How to take a screenshot
3. How to take a screenshot in Windows 7
4. How to take a screenshot in windows xp
5. How to take a screenshot in Word 2010
6. How to take a screenshot on a MacBook Air
7. How to take a screenshot on an iPad
2. How to take a screenshot
3. How to take a screenshot in Windows 7
4. How to take a screenshot in windows xp
5. How to take a screenshot in Word 2010
6. How to take a screenshot on a MacBook Air
7. How to take a screenshot on an iPad
Make: Apple
Model / Product: MacBook Air
Version: OS X 10.6.5
Objective / Info: Learn how to take a screenshot on a MacBook Air.
Model / Product: MacBook Air
Version: OS X 10.6.5
Objective / Info: Learn how to take a screenshot on a MacBook Air.
1
Use your Macbook Air and browse to the desktop or website that you want to take the screenshot of.2
Click the "4" + "Shift"+ "Command" keys on the keyboard at the same time.3
Click and drag the crosshairs until the area you want to capture is selected.4
Release the touch-pad to capture the screenshot. You should hear a camera clicking sound indicating that the screenshot has been captured.5
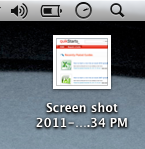
The captured image should appear on the desktop labeled in this manner "Screen shot 2011-12-30 at 2.17.03 PM.png" Note :
The name for your screenshot will reflect the time and date when you took it.
6
This task should be complete. Review the steps if you had any issues and try again.Submit questions or request for more guides in the questions section below.comments powered by Disqus


