


This guide is part of the Microsoft Word 2007 series
1.
How to add a url to a word 2007 document
2. How to change the hyperlink color in word 2007
3. How to hide or view the ribbon in Word 2007
4. How to insert a url into a word 2007 document
5. How to install the PDF Add in for Word 2007
6. How to password protect a word 2007 document
7. How to use auto save in word 2007
8. How to use Microsoft Word 2007
9. How to use track changes in word 2007
10. Save word 2007 document to word 97 to 03 document
Make: Microsoft
Model / Product: Word
Version: 2007
Objective / Info: Learn to activate the track changes feature and make and observe the changes in Word 2007.
Model / Product: Word
Version: 2007
Objective / Info: Learn to activate the track changes feature and make and observe the changes in Word 2007.
1
Open word by clicking the icon on the desktop of the start menu.
2
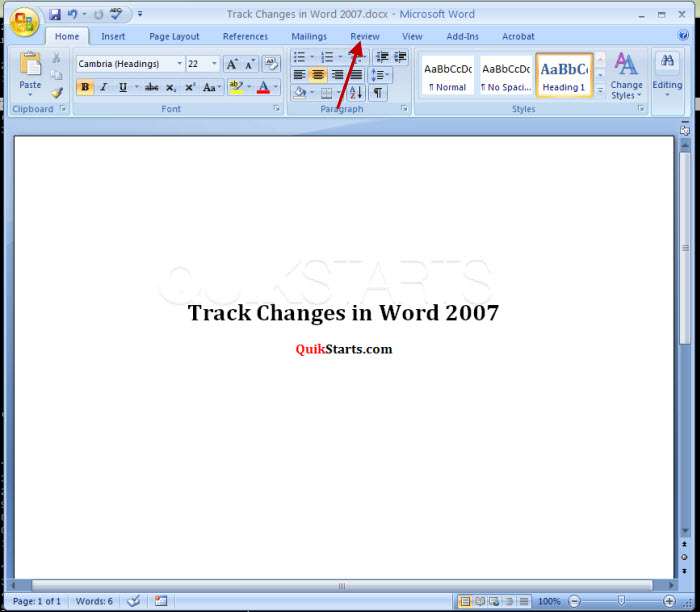
By default the track changes feature should be off so we need to turn it on. Click the "Review" tab on the menu bar.
3
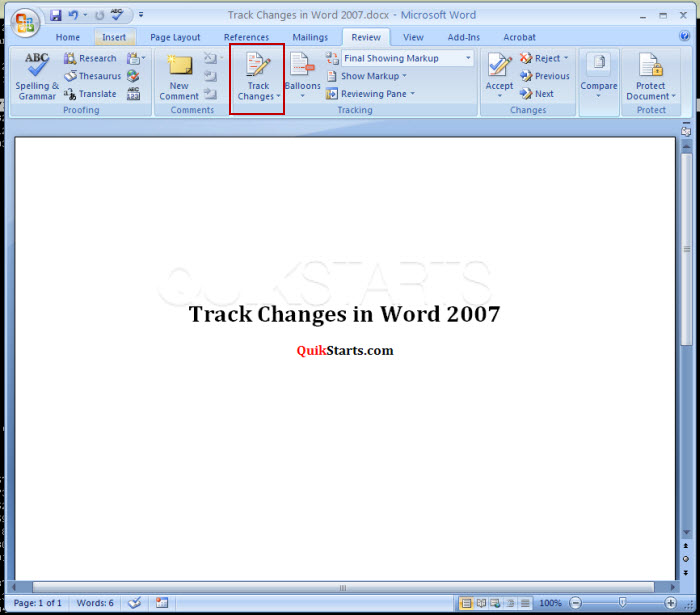
Click the "Track Changes" option. You have now activated the track changes feature. From this point forward, all of the changes that are made to this document will be tracked.
Note :
Changes can consist of but are not limited to; text removal, inserted photos, changing letters from lower to upper case and more.
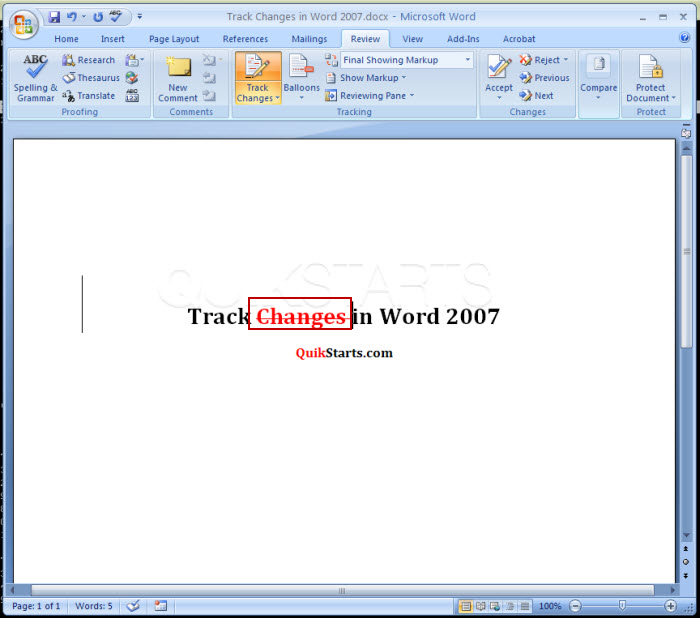
4
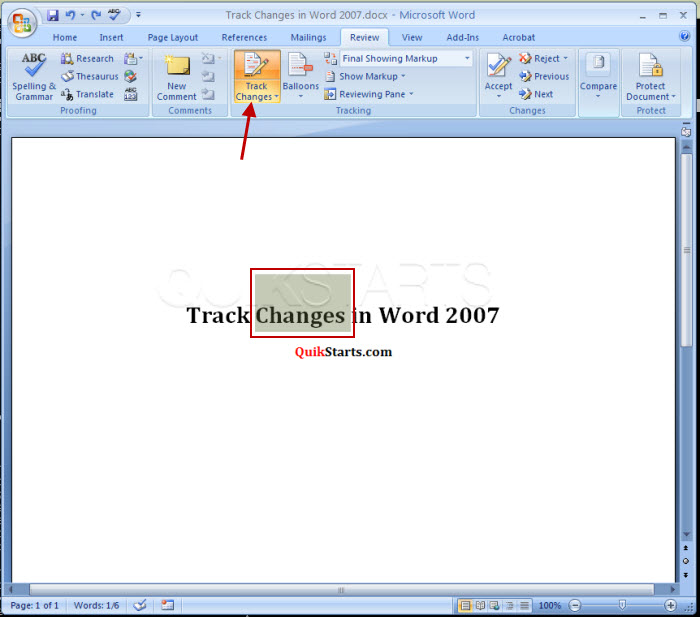
Next we will highlight and delete the word "Changes"
Note :
The track changes feature is still enabled and you can tell because the button has a depressed appearance..
5
Press the "Delete" key on the keyboard to remove the word "Changes" and a red line should appear through the word to identify that the change was made.
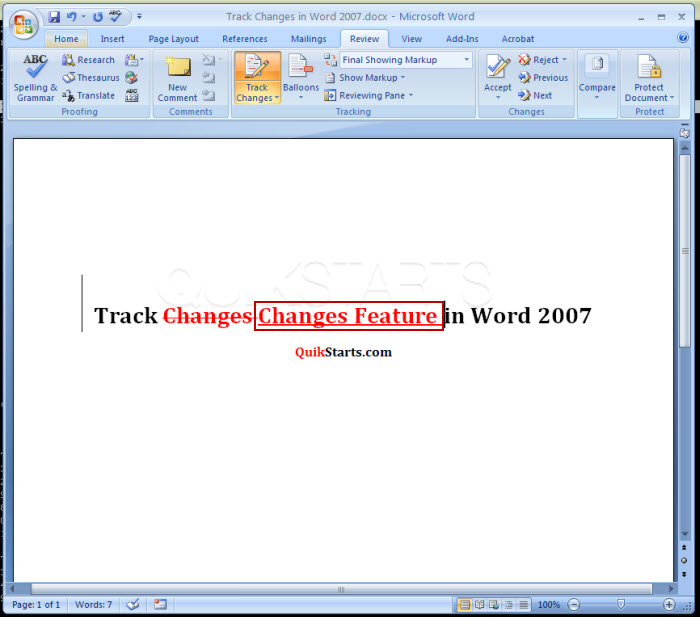
6
Now in addition to removing a word, we will further demonstrate this feature by adding new text to the document. Click behind "Changes" and type in "Changes Feature". Now the words "Changes Feature" appear in red and underlined.
7
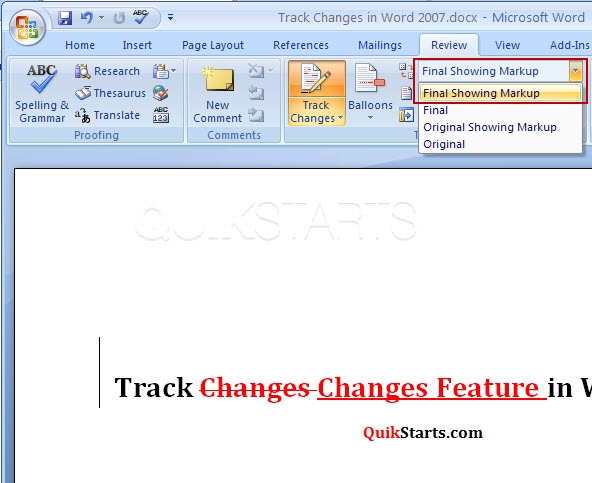
Technically you have witnessed how to use this feature, however, to go one step further, we will show you how to view this document in different stages such as before and after the changes in the next 2 steps.8
Directly beneath the "Review" tab, you should see a drop down menu that may say "Final Showing Markup", click the drop down and you should see 4 options.
Note :
"Final" shows the document after changes. "Original" shows the document before the changes. The other two options show the markups that you made.
9
This task should now be complete. If not, review and repeat the steps as needed. Submit any questions using the section at the bottom of this page.comments powered by Disqus
 Ask a question or provide an answer