This guide is part of the Microsoft Excel 2010 series
1.
Add a print button to the tool bar in excel 2010
2. Create a bar graph in Excel 2010
3. How to add a background image to excel 2010
4. How to add a column to a spreadsheet in excel 2010
5. How to add a URL to Excel 2010
6. How to adjust the print layout in Excel 2010
7. How to auto fit column width in excel 2010
8. How to convert a column into a row in Excel 2010
9. How to convert excel 2010 to PDF
10. How to create a dashboard in Excel 2010
Make: Microsoft
Model / Product: Excel
Version: 2010
Objective / Info: Learn how to make vertical column headers in Excel 2010.
Model / Product: Excel
Version: 2010
Objective / Info: Learn how to make vertical column headers in Excel 2010.
6
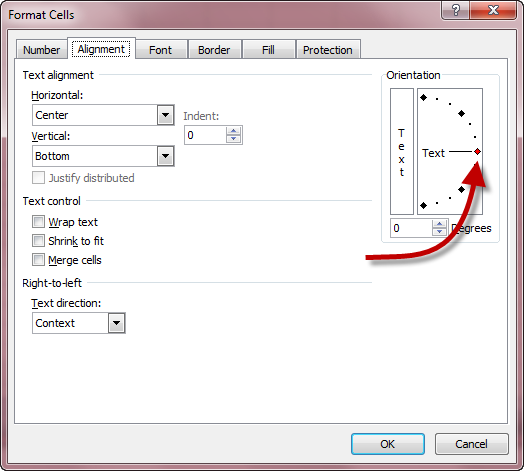
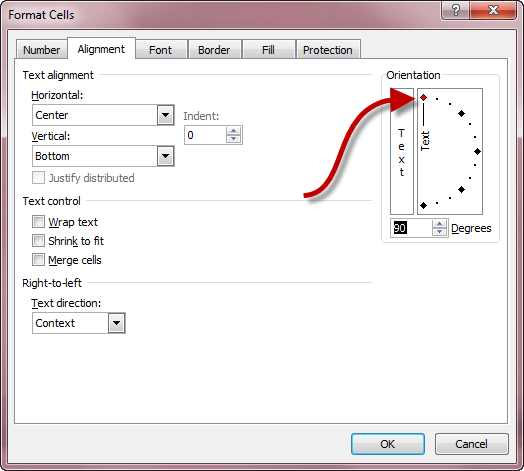
Click and drag the red diamond to the top of the box until it is completely vertical.
Note :
The box beneath should read 90 degrees.
7
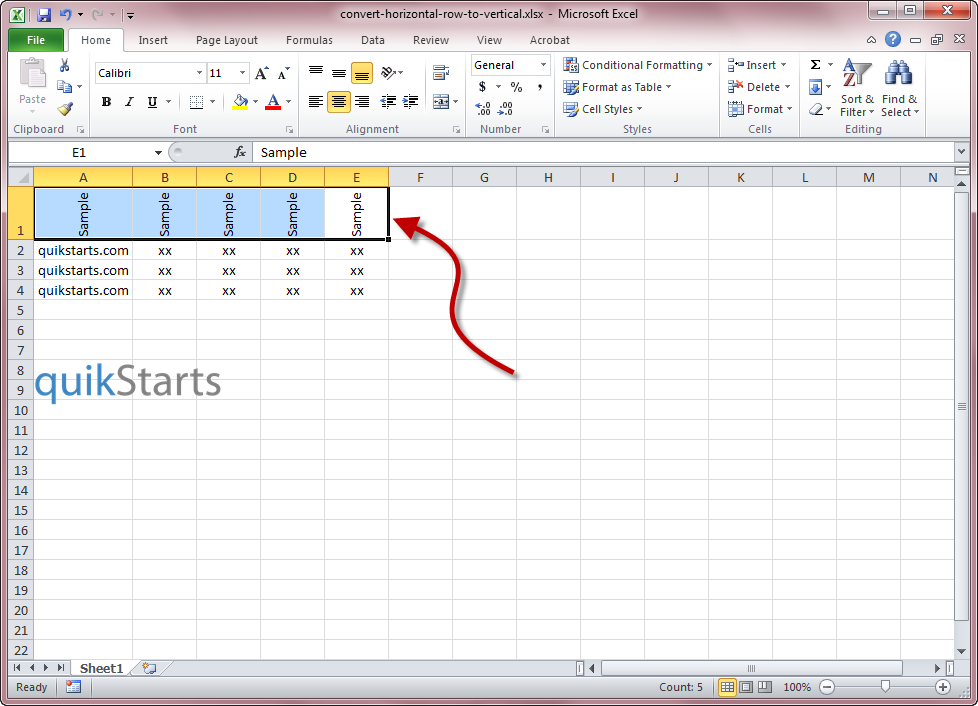
The row that you previously selected in step 2, should now show all of the text in a vertical layout.
8
This task should be complete. Review the steps if you had any issues and try again.Submit questions or request for more guides in the questions section below.comments powered by Disqus


