


This guide is part of the Google Docs series
1.
Auto fit column width in Google docs spreadsheets
2. Change a date in a Google doc spreadsheet cell
3. Change the hyperlink color in a docs document
4. Change the slide speed in Google Docs presentation
5. Convert Google docs spreadsheet into a PDF file
6. Convert Google docs spreadsheet into an Excel file
7. Freeze top row when scrolling in Google Docs
8. How to add a bookmark in Google Docs
9. How to add a cell border in Google Sheets
10. How to add a column to a google docs spreadsheet
Make: Google
Model / Product: Docs
Version: Presentation
Objective / Info: Learn how to change the speed at which the slides change automatically during a Google Docs embedded presentation.
Model / Product: Docs
Version: Presentation
Objective / Info: Learn how to change the speed at which the slides change automatically during a Google Docs embedded presentation.
1
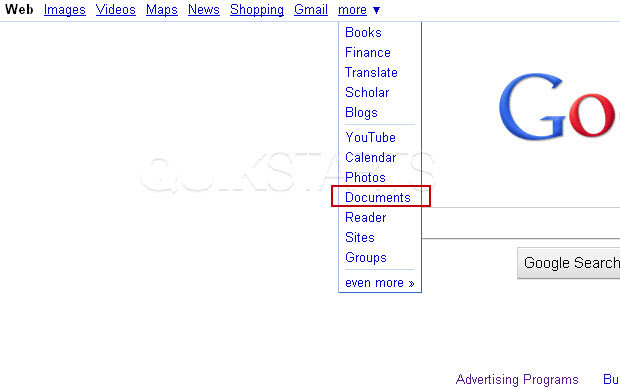
Launch Google Docs by visiting google.com, click the "more" menu option and select "Documents"
2
Open your existing presentation containing more than 1 slide.3
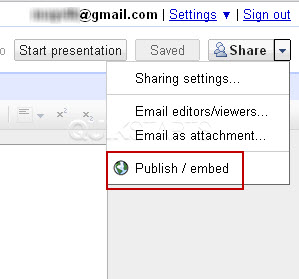
Click the "Share" button in the upper right hand corner of the screen, then select the "Publish / embed" option.
4
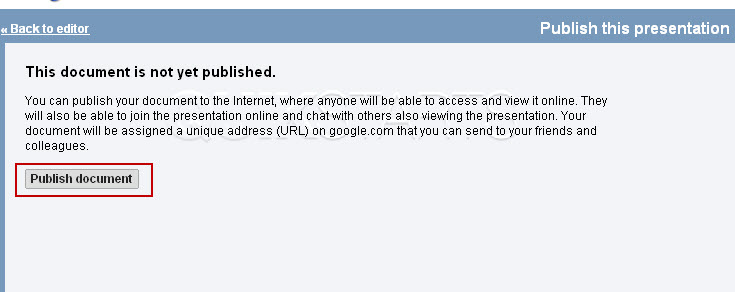
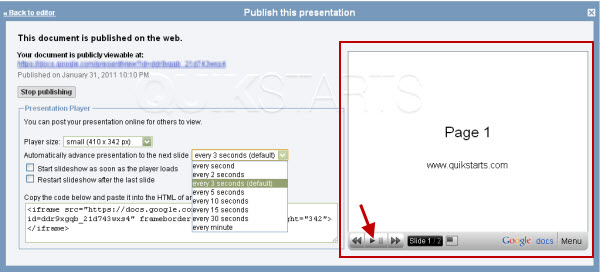
Click the "Start Publishing" button.
5
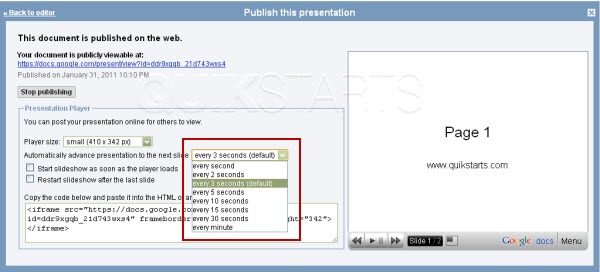
Select the dropdown window next to the phrase "Automatically advance presentation to the next slide" and choose that duration you want in your presentation.
6
Press the "Play" button on the right hand side if yo want to preview your settings.
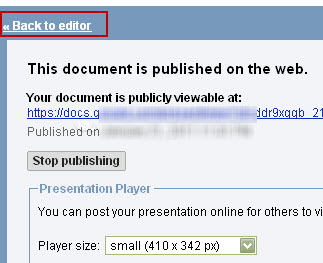
7
Click the "back to editor" link when you are done.
8
This task should be complete. Review the steps if you had any issues and try again.Submit questions or request for more guides in the questions section below.comments powered by Disqus
 Ask a question or provide an answer